
Part 2 - Random Surf Photography Tips
After a couple of years, which is still pretty inexperienced by some, I have come across a few tips and learnings when using and looking after a water housing. I thought that these are worth passing on.
Part 1 - is here , where I cover some info that I found useful, including buying gear and housings.
So you have just bought a water housing - what next
After you've unboxed your housing and ports, it's pretty tempting to assemble it all and then hit the surf. However, most water housing manufactures will explain that you should assemble the housing WITHOUT your camera, and then perform a series of tests in either a bath, bucket or swimming pool. This will check that there are no manufacturing and assembly mistakes. It's recommended to do successively long dunk tests. 10 seconds, 30 seconds, 60 seconds - and check for leaks after each dunk. Whilst doing the dunks it also worth shaking the housing around a bit - cause that's gonna happen in the water, and also pressing the buttons and twisting any levers to make sure that the seals are all working. Aquatech has a video here on this.
Before you get started?
OK so your housing passed the test, and you are ready to hit the surf. So how are you going to stop water drops on your port ? Yea, you might not have thought about that, but the secret to getting crisp images is down to preparation of your port.
Dome PORTS and FLAT PORTS - there's a difference
Firstly there are two popular ways to prepare your ports, one for dome ports and one for flat ports. The way that the water runs off a dome is different than a flat port. Dome ports are called 'Wet' ports as they tend to be used under the water and have a wet film over the dome. Domes are also used with wider angle lenses. Flat or 'dry' ports, on the other hand, are intended to be used above the water with a longer focal length.
DOME PORTS - THE LICK & SPIT METHOD
Aquatech has a good video on the difference here . Tom Woods also has good video on how to keep a dome port clear, which is here. Connor Trimble also has a great video on how to keep water drops off your port.
I have a dry port, that fits my 50mm 1.8 and 24mm 2.8 (80mm and 40mm focal length equivalents on my camera) and so I'm more familiar with how to prepare dry ports.
In researching the techniques, there were two common techniques that I came across. One was candle wax and the other was using a squeegee. I'd used rain-x previous on my GoPro, and so I could see how wax would be equivalent. GoPro has a glass port element, vs perspex of my housing and Rain-x directions for usage is only for glass (although I do know some photographers who use it on perspex). I didn't really fancy ruining my port so Rain-x was out.
DRY PORTs - WAX and SQUEEGEES
The idea with the wax method is that, you put a thin cross hatched layer on your port, rub it in, and buff it until it's clear (although I tend to be a lot more gentle with my port than Tom was in his video linked later). The squeegee on the other hand, involves using a squeegee, to wipe the port surface, removing droplets, before taking a shot. That means you have to ensure you have enough time to do that after surfacing, vs the wax method where once you surface, after duck diving a wave, the water will drain off quickly and a quick shake will remove any lingering droplets - it's pretty fast.
Candle wax seemed like the right direction when I heard it - but I was concerned with it being made consistently and free from anything that would damage the port element. The trick is to use a particular bar of surf wax. I first came across this technique by Tom Woods, who has a free workshop on keeping ports clear. Using surf wax made a lot of sense, a regular and consistent formula that is readily available. I won't tell you which surf wax and steal Tom's tips, sign up to Tom's workshop - all will be revealed and believe me, which surf wax makes a difference.
I tried different techniques of applying and then seeing the effect by using a bucket to check how the water would work. I was pretty convinced this was the way to go.
I tried this, on my first session and it work really well. I noticed that over time the wax will become less effective as the water affects the wax eventually, probably diluting and washing away the oil. Depending on conditions I can get some where between 45 mins to 90 mins. If I spend a lot of time duck diving waves, or being in the impact zone then that reduces the time that the wax is effective vs other sessions where I can keep the port dry, by mostly swimming on my back.
Typically when I'm out in the water, when I have surfaced, providing there's nothing to shoot, I turn the camera around and check the front port, and see if the wax is still working - I also check other things, - like leaks ! but more on that later.
I also found that if I attach a squeegee to my housing, I can use that method once the wax stops working and that can extend the session time if it's good conditions. However, I prefer the wax and shake method for its speed - and usually by 90 mins I have had enough time swimming and filling up my SD card. I know plenty of surf photographers who use just the squeegee method, and get great shots. It really depends on your workflow in the water and worth trying both.
I made my own squeegee by cutting a window one in half and drilling a hole to attach some nylon rope, you can buy them and the best one is a dishwashing OXO brand. Aquatech also sell a similar squeeze.

Essential Gear
Fins & Fin Savers
The next thing is to make sure that you get a decent set of fins, to battle with currents, to get out of the way of surfers and to accelerate into position. Even in small days where you might be shooting standing in chest deep, being able to quickly get out of the way is much faster than without them. I use Dafins, but there are a number of fins brands out there, However I'd recommend body surfing fins rather than body boarding fins. Here are a few of review links.
Tom Woods has recently switched fins, and he's spoke about it in this video - it's worth a watch.
Fins savers attach to your fins and your ankles, so that should a fin come off your foot you won't loose it. When, I got my fins I didn't think I needed fin savers - I wasn't planning on going in massive waves. However, I noticed that even on small days the whitewater occasionally clipped the back of my heels and pulled the fin part way off. For the small investment, it's worth it. The only downside is that its harder put the fins on the in water. With fin savers, it's much easier to put your fins on before you enter the water. Getting them off in the shallows is fine, you can feel where the tab is fairly easily. I use the Limited Edition ones but Ocean and Earth also do them, and they are stocked in most surf shops that sell body boards or hand planes.
HOW to transport your gear - my Solution.
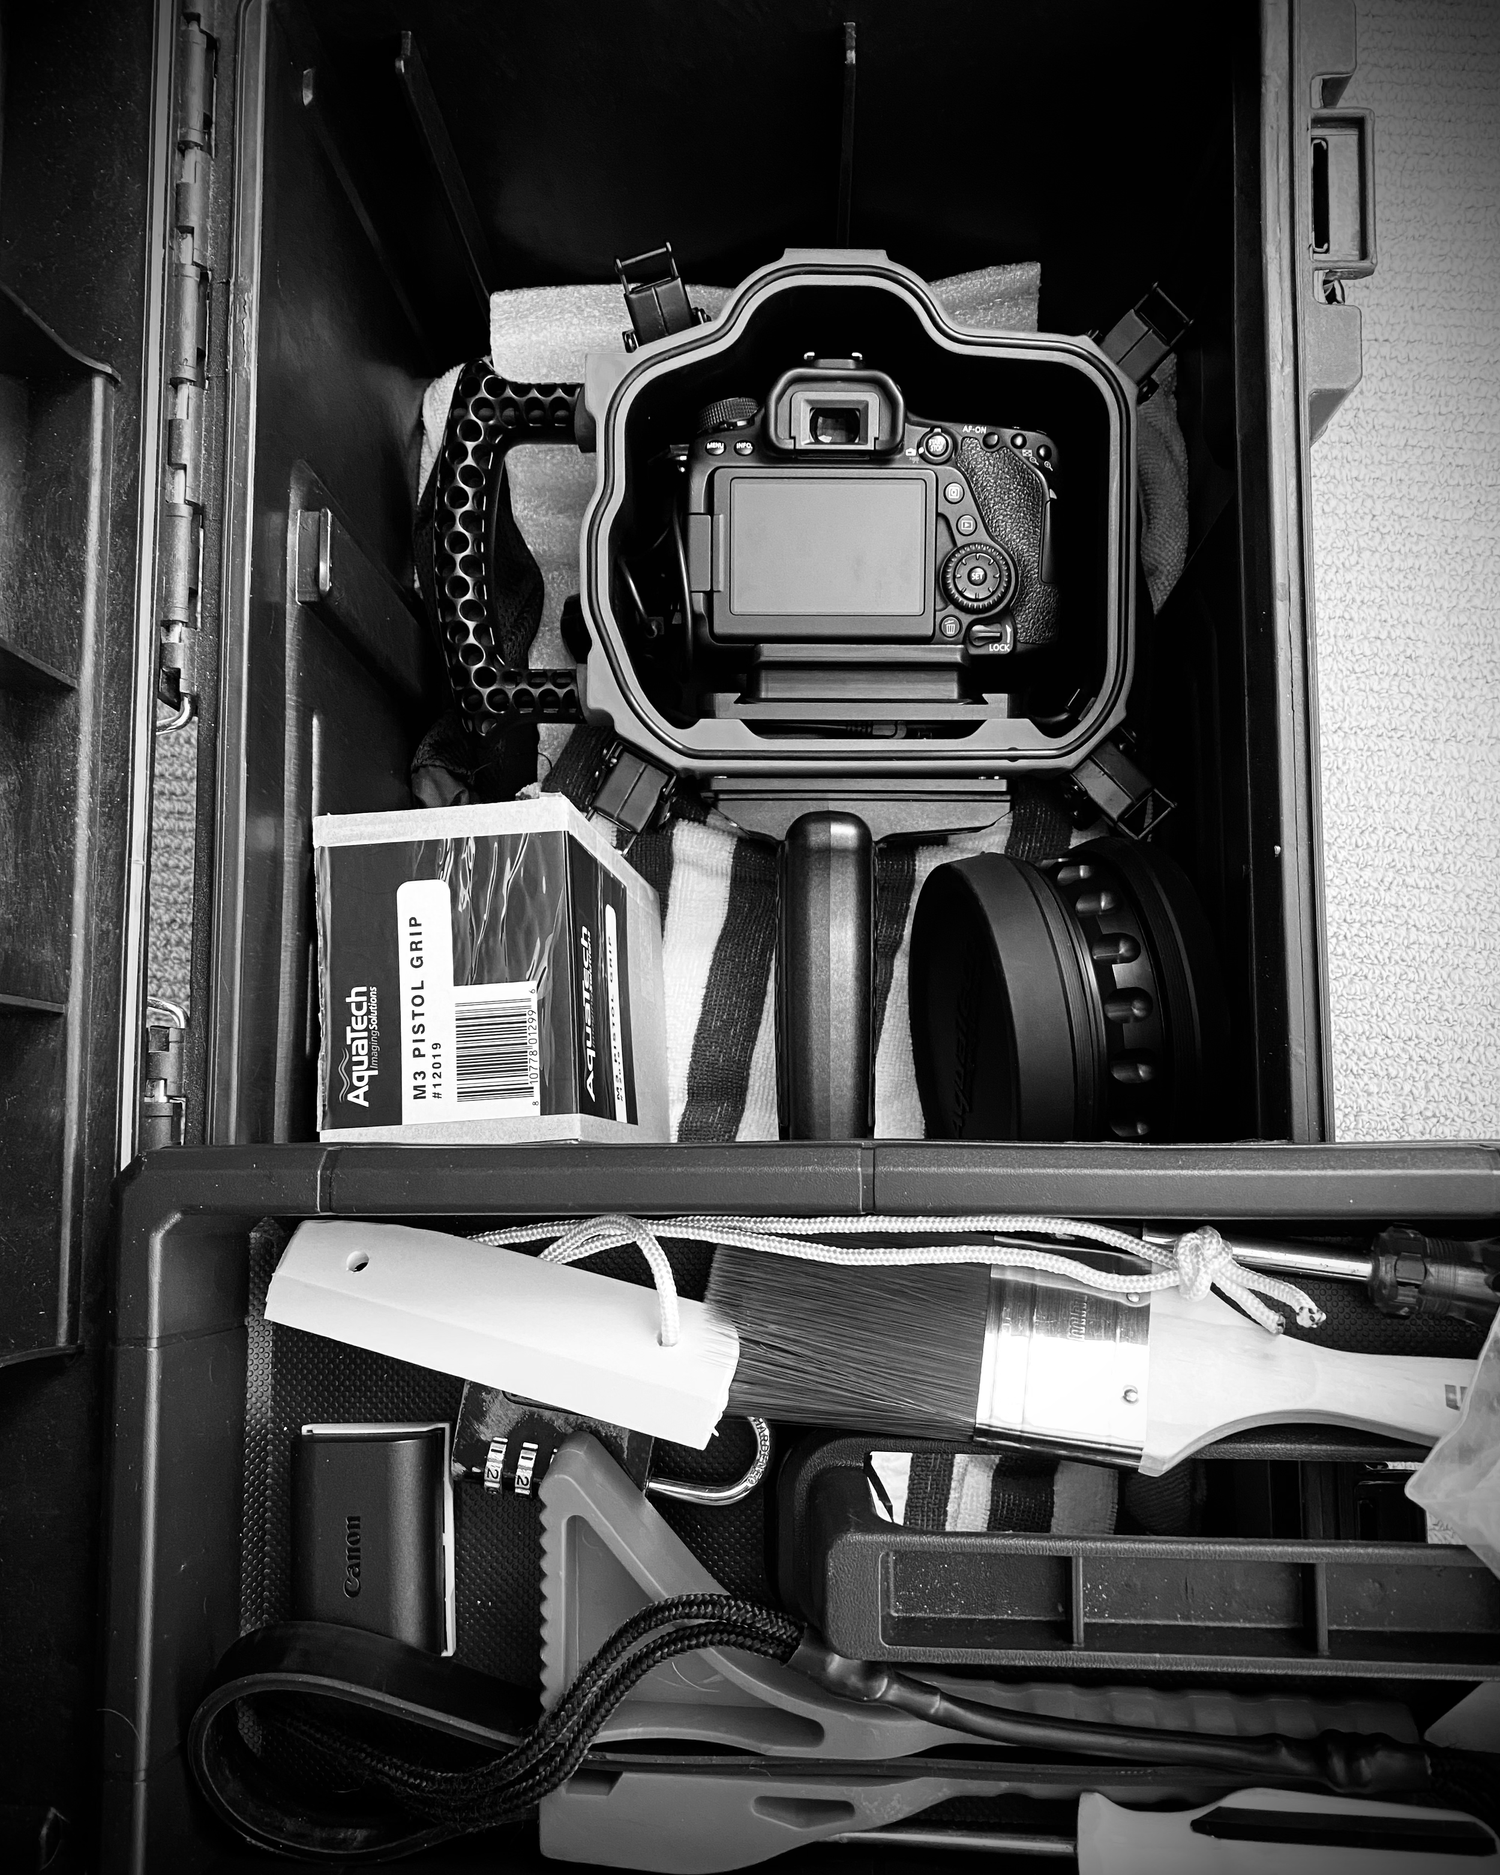
I mostly drive to the beach, so I wanted a way to keep my housing and all the bits needed in one container so that it's easier to pick up throw in the back of the car. Whilst you can get yourself a pelican case, it's a bit pricy for someone who isn't flying on aircrafts with my housing and camera gear. I pick up a generic tool box from the local hardware store, it even has holes for padlocks if you want to secure you gear in the car. It makes it less of a barrier and quicker to get on the road, if all I have to do is grab the toolbox and a bucket with my Wetsuit and Fins. All I need to do before hand, is set up my camera settings. Things like drive mode, mode, focus points, and remove back button focus. I'll then place the camera, with the two lens that I use in the toolbox. After a session I always clean the housing and get it ready for the next shoot, o-rings clean, backplate clean and port clean so that I can get moving much quicker. I'll go into my routine for that later.
In the tool box it contains all the water housing equipment including my squeegee. I also has a standard paint brush, spare battery, spare card, small towels, wax and a couple of lens cloths for the wax. The paint brush is for removing any sand on my equipment.
If you are traveling on foot, then a back pack might be the better option, you can't go past the Zak Noyle Camera Bag which includes some nice touches for surf photographers.
HEAD GEAR
I personally don't use a surf helmet, I don't shoot reef break waves, I generally shoot smaller and slower beach break waves, and I try and avoid busy times and so far I have survived. I have left the water before I was ready a few times as my local beach does get very busy and it's difficult to get a safe shot in those circumstances.
There is a good round up of helmets by online zine "The Interia" here .
Gath helmets are the OG, but the Simba ones look interesting, and if you are planning on taking on more serious conditions then it's probably a good idea. Just remember that It won't make you invincible. The helmet covers the top, back and sides and won't protect you face or neck from injury. The best option is to limit your exposure to dangerous conditions.
At the beach.
Assessing the conditions
The first thing that I do, when I get to the beach is check the conditions. If you are a surfer already, you'll know that the forecast can sometimes be very different when you turn up in the morning. I usually check what the forecast for waves, wind and tide will be using Surfline . I usually check a few days out, to see which days have potential, and I continue checking right until the day prior. Surfline will give you a indication of swell size and direction, wind strength and direction as well as tides and when is daylight. Surfline Premium has a 14 day forecast, which helps me to roughly plan out a week or two in advance.
I will also check Clear Outside, to get an idea of predicted cloud coverage, depending on the conditions that I'm looking for. Clear outside breaks down Low, Medium and High Cloud coverage on an hour by hour basis as a percentage.
If want to shoot surfers riding waves, then I work out if the waves are make-able, is the the wave breaking in a way that is a surfer can ride the unbroken part of the wave. If the waves are 'closing out', breaking all in one line and very fast, then the chances of a surfer getting a decent riding are slim.
When conditions are like this, you are better off trying to capture breaking waves and 'empty' shots, placing the wave at the centre of the story. As well as how the wave is breaking, I also check if the waves and conditions within my capability to manage. If you are a surfer, you know what waves you would feel comfortable in, so start by shooting the same waves that you'd surf. If you are not experienced with the surf , then- start with small days and build up as you confidence and experience increases. Just remember that the larger the surf, the more water moves around and the stronger the rips.
I also assess where would be the best spots to position myself relative to where the waves are breaking. Is there a defined pattern ? is there a gap between the waves ? what is the distance between the sand banks, where should I swim out ? As I shoot with prime lenses, It also helps me to determine which lens I need to use for the session.
A really good tip, that I learned from assessing conditions for surfing, is to look to see where the surfer are sitting, if you only see small waves break inside (closer to the beach) of the surfers, then you can almost definitely expect bigger surf to break close to where they are sitting, there is a reason why they are sitting there! A good surf check can be 20 minutes, just to see if here are any bigger sets coming through.
Getting THE HOUSING Ready
The next step is to then assemble the housing, and attach the lens that I think will be best for conditions. Generally the wider the lens, the closer you will need to be to the surfer or the wave. I use a 40mm and an 80mm, I'll use the 40mm if I think I'll shoot underwater or if the waves are bigger and closing out - that way I can sit further out and reduce the amount of time sitting in the impact zone. If the waves are smaller and well organised, with a nice channel then the 80mm comes out, it's also a great water portrait lens.
I'll assemble the housing by attaching the front port and checking the front o-ring for any debris, I'll just hand tightening at this point - I'll leaving the port protector on the end so that the front element is protected when I flip it over and attached the backplate. I'll assemble camera and lens, add on the mount plate and connect the trigger wire and slide the camera into the housing after removing the lens cap. Whilst the backplate is off, I will then turn on the camera and hold it in place whilst I look through the view finder and check, that the buttons all work and that I can focus (without my glasses) and take shots. I also check my settings, if I'm in TV (Shutter priority) what shutter speed do I need for the aperture range I'm looking for with the available light. Usually it can be between 1600 and 4000 depending on the lens (one is 1.8 and the other 2.8) and light. I'll point the camera at various locations in the car park, the bright sky, the dark floor of the car park and see how this changes the shutter speed or aperture. I tend to use auto iso, which does a great job of getting a decent exposure.
I'll then leave the camera turned on and attach the back plate, visually checking the rear O-ring for debris, I'll align the corners of the backplate and then clamp it down (usually opposing clips at the same time) and I'll check that they are secure and I can't pop them back out (the older clip design). I'll turn over the housing and place it resting on the backplate. I'll then tighten the front port further, and remove the port protector cap. I'll visually check the inside of the port to see if the seal looks OK and uniform around the inside of the port. I'll also then tighten the port a bit further by hand to make sure its well and truely sealed.
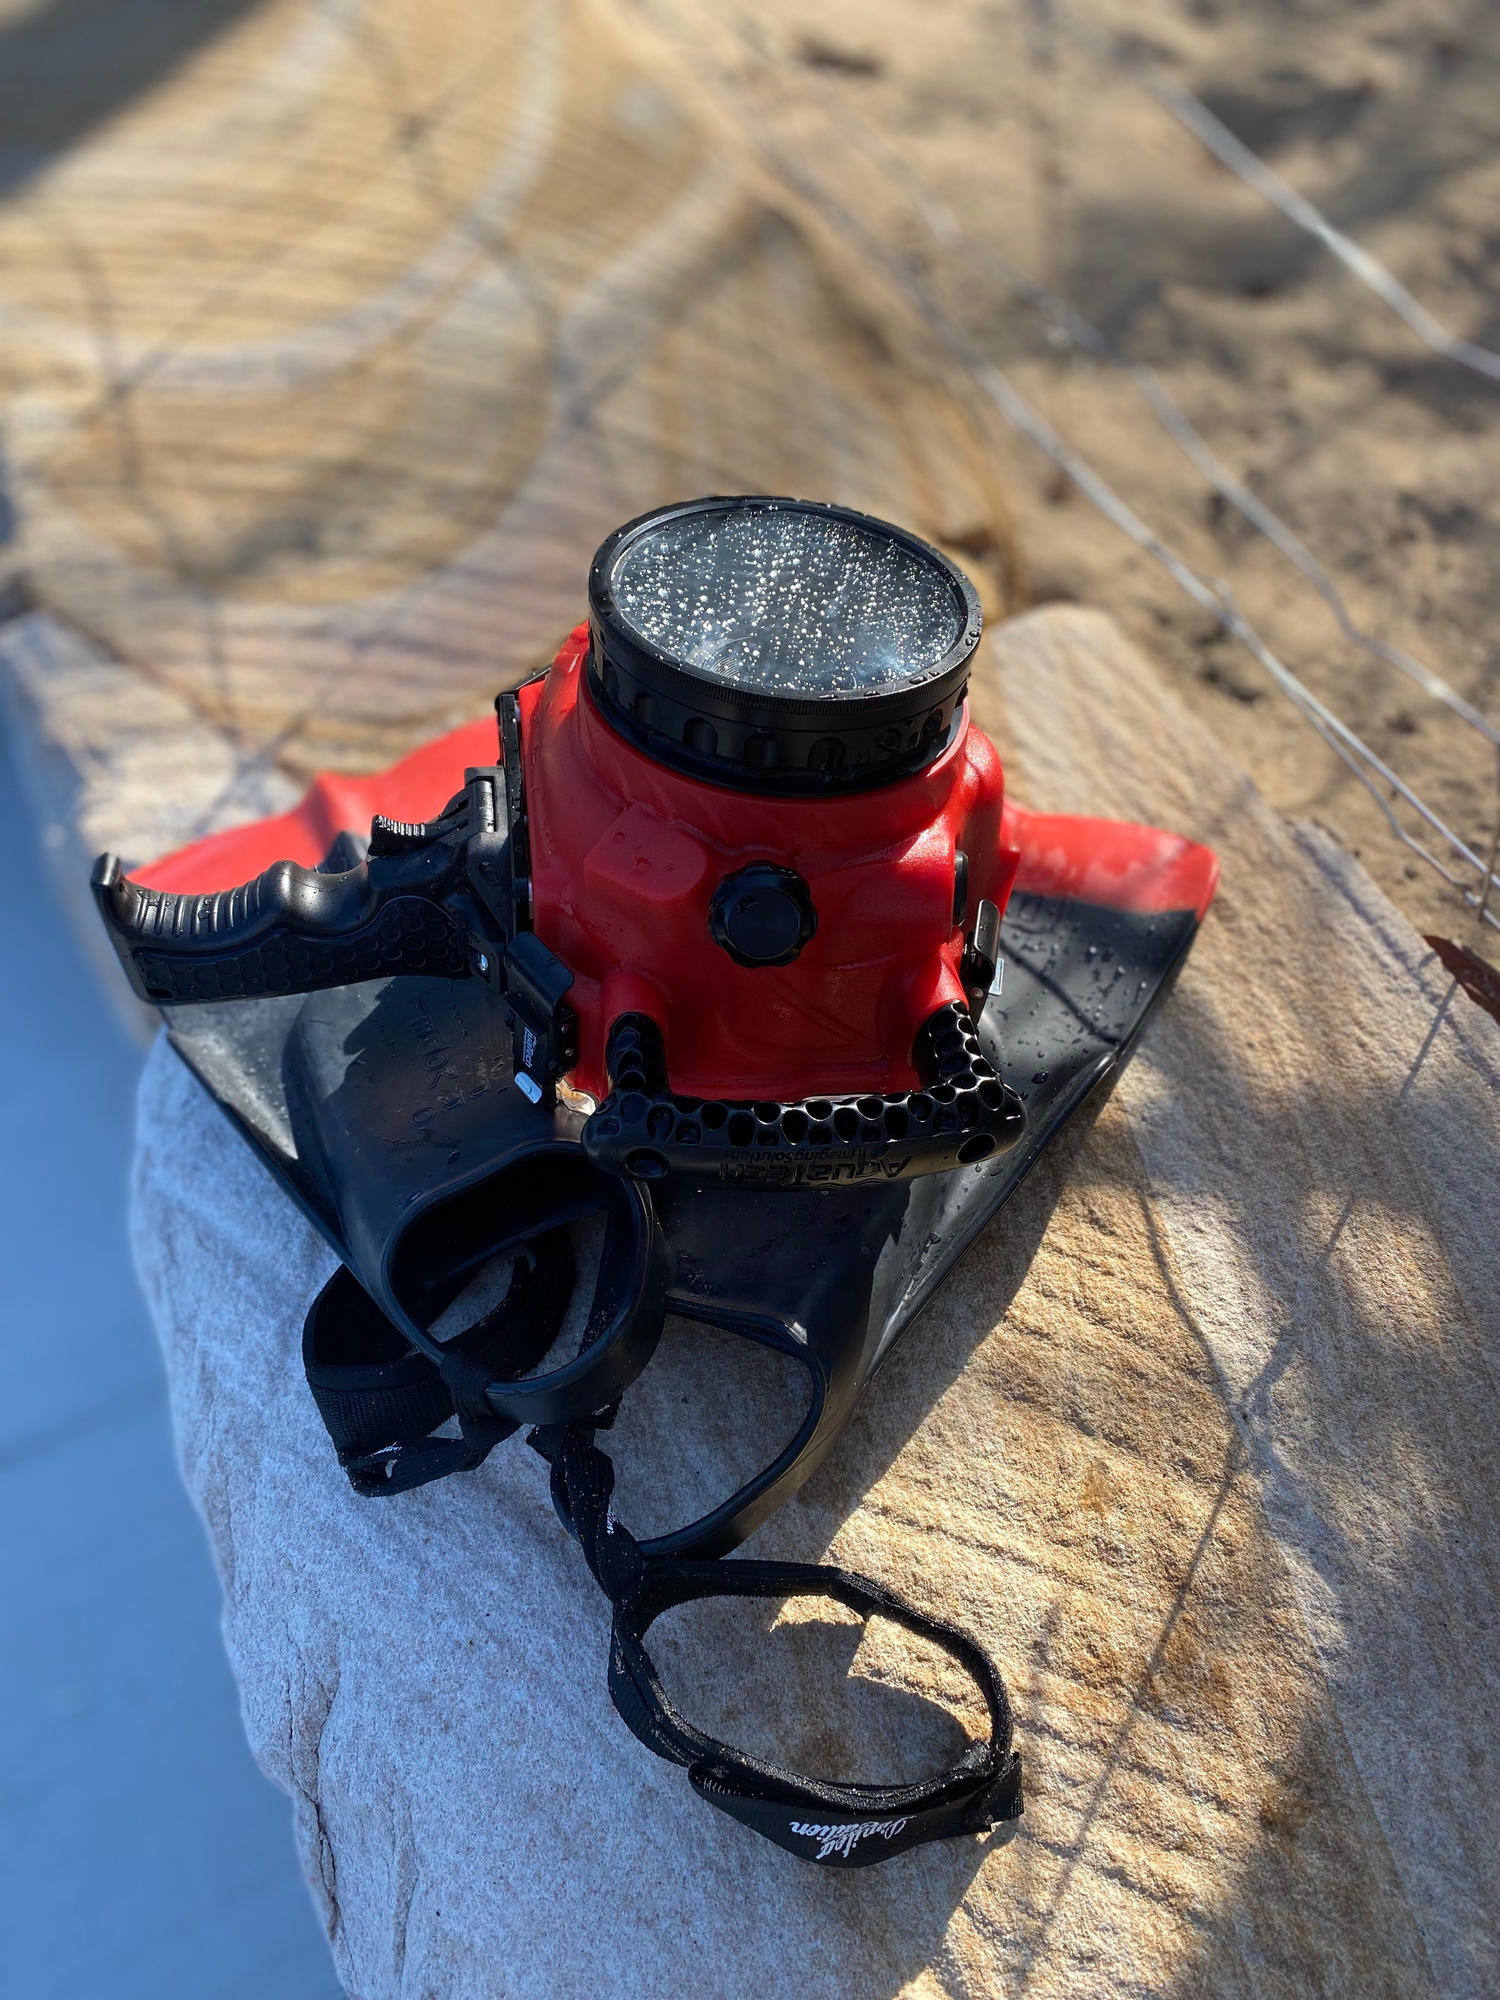
I keep a seperate bar of wax, just for my water housing as I don't want to risk getting sand onto the front port element and creating scratches by using the same wax that I'd use on my surfboard. I keep a seperate 'special' bar along with the two lens cloths - one for smooshing (which retains lots of wax) and one for buffing (nice and clean). I apply a gentle cross hatching of wax and then smudge (smoosh!) that in in small gentle circles, there should be no solid wax but the waxy film visible, I'll then buff that gently until its transparent and do another round of cross hatching, smooshing and buffing. I used to apply the wax to the port the night before, but the port protector would remove some of the wax - so now I just do that at the beach. I'll check the port visually in different directions and angles to ensure that the wax is transparent. The final step is to attach the squeegee and the wrist leash to the housing.
I'll leave the housing in the back of my car while I get into my wetsuit, and then place my housing on top of my fins while I lock up the car.
PRO TIP - DON't RUSH
The number one lesson that I've learnt from other peoples mistakes is, don't rush. Most accidents, leaking housings or incorrect settings are down to frothing too hard and rushing to get in the water. A missing a step in the set-up can be a cost you some decent frame, or at the worst case you camera gear.
Slow down, enjoy and savour the process.

Action shot, thanks to another surf photographer Jamen Percy (@bombora.days)
Getting in the Water & Staying out of trouble
The Ocean Dunk Test
Once I have put my fins (and fin savers on) and attached the wrist leash at the waters edge then I'm ready to get in the water. Rather than diving straight in, this is the time for the 'dunk test', yes the same one as before - successively long dunk tests. 10 seconds, 30 seconds, 60 seconds - and check for leaks after each dunk. I do this as I'm walking backwards into the water between waist to chest high. If there's a leak I want to be able to keep the housing out of the water and any water away from the camera and the electronic leads.
If that passes the test then I start swimming out, I personally find it easier swimming on my back and sides, I check for waves and surfers over my shoulder and this way keeps the port out of the water for longer. Small waves and white water you can duck under on your back, larger waves I flip over and duck dive a bit deeper, then continue to swim on my back or on my side, with the camera port out of he water. If there is a nice rip I'll use that to swimming out there is easier, the rip will assist you and the waves break less, generally there is no one surfing and its easier to see what's coming.
OBSERVE YOUR SURROUNDINGS
Once I start getting into place where I think it will be good for the shot, I will just float and turn towards the horizon to watch where the waves are breaking, and how the surfers are taking on the waves. Take time to observe what is happening in the line up. A great tip is to pick two landmarks, one on the headland and one on the beach, that can't move - you can use these to check your relationship to them in the ocean and this is invaluable in working out which way a rip might be going or if you want to stay in a particular spot. I try and work out the best spot to get the shot and swimming in, out, left and right to be in the right spot - sometimes you see a wave and instinctively know that you need to be either further out or further in, so I'll sprint keeping my eye on the surfer that is most likely to be in the best position to get the wave. If you are swimming on your back, this make its easier to get into position if you are swimming towards the shore.
STAYING SAFE
As a surf photographer, my priority is not to take photo's - but to stay out of the way of surfers, whilst I'm taking photos. I don't expect surfers to avoid me, I get the shot without being in the way. I will always make a split second decision to swim and dive out of the way if I'm in doubt, and if the surfers are beginners or not confident then they will not be 100% in control of their surf craft and I exercise extreme caution. Make a note of beginner surfers as they take on waves and position yourself accordingly by giving them plenty of space - also note the competent surfers too so you know who to look for when they are paddling for a wave. Don't dismiss taking a few shots of beginners, they will be more stoked with a shot, than the local good surfer who will have plenty of photos - just do it safely.
How to spot beginner surfers
- They struggle to sit on a board
- They paddle with legs wide open (to balance)
- They are either to far back on the board or too far forward
- They don't look side to side (some experienced surfers do this too) or behind to check their position relative to the wave as they paddle.
- They ride the wave straight, with the whitewater, rather than across on the unbroken part of the wave.
- They paddle for closeouts, get picked up and dumped nose first into the ocean
There is nothing worse than looking up to see a row of beginners all paddling straight at you, 100% committed to taking off on a wave that is a closeout. Dive as deep and as long as you can !!
Keep on Checking
Between waves, when its quiet or after a deep dive I'll check the back of the port to see if there is any leaks and I'll check the front of the port - is the water still beading off or do I need to switch to the squeegee. Sometimes the spray off the back of the wave can leave small mist of droplets on the lens, so I usually do a dunk and pull the port out of the water and let the water sheet run off leaving a clear port, ready for the shot, if there is a drop or two a quick shake can get them moving. If you have just surfaced and can see a good wave, a quick dunk and a shake might be enough to get the shot. During one of these checks I noticed a small fogging on the front element, the housing had sprung a leak (down to me), if I wasn't checking it could have been a lot worse.
Getting In to the beach (or out of the water)
You will have noticed that with the ebb and flow, the larger waves will have pushed you back into the shallows which you have had to swim against to get back into position. So if you are in the rip and are ready to come in, look sideways and see where the whitewater is and swim to that location - the whitewater will push you into the sand bank - "out with the blue and in with the white"
I swim on my side or back and then when there is a wave I flip over and body surf the wave in. When I'm in the shallows I'll remove the fins as it's easier to walk out of the shallows.

Après Session - the cleaning routine
Rinse #1
I'm pretty keen to maximise my return on my housing, so I'll give the housing a good rinse with fresh water at the showers - if I can find a tap at the beach I'll fill my wetsuit bucket with water and let the housing soak, while I change out of my wetsuit.
RINSE #2
Once I am home, I'll remove the leash and squeegee and give the housing another rinse with the hosepipe, making sure to give the clips and the trigger a good blast, and I twist the buttons to remove any salt. I'll leave the housing to soak in the bucket while I rinse and put away my other gear - I'm pretty sure you can't over rinse the housing !!
Dissasemble
To disassemble my housing I start with the port, invariably the ports is so tight you can't loosen it without loosing the front element retaining ring (the reason for my leak). I invested in a 'Belt Wrench' which I use to just loosen the port so I can open it later, I then flip the housing over and open the back plate and remove the camera and remove the rear o-ring, I then flip the housing over and remove the front port and front o-ring. You can usually hear the sand grating in the front port when you un-screw it. I loosen the trigger screws and I leave the disassembled housing to dry.
DRY Routine - Ready for the next Session
Once the housing is dry, I then use a paint brush to brush the threads of the front port and housing to remove any dry sand. I clean the port element, inside and out using a small about of Novus polish 1 and then put the rear and front caps on the port ready for next time. Next I use a damp kitchen towel to clean around the o-rings and the seats that they go in, to also remove any dry sand. Once dry I place the O-rings back in the housing and I store the housing, ports and back plate disassembled, rather than assembled and under constant pressure - which will preserve the silicon O-rings. According to Aquatech, cleaning your O-rings should be after every session if you shoot at a beach break. There is a great video here that explains the process.
FINAL WORDS
You should also get your housing serviced regularly to keep it in working order and protect your camera gear. Your gear is expensive and so is the housing, so look after your gear.
I hope that these tips answer some of the questions that you might have, or filled in a few gaps when using a housing and swimming in the ocean, if I have missed something please reach out and let me know.


